Register your service-provider organization.
Getting set up tells MBN what you do and where: which is exactly how the right tenders find you. Here's the path from signup to an approved, live organization.
Create your SP organization, assign or hand over Admin, and submit for approval.
None: start here.
About 20 minutes (autosaves; resume anytime).
Reflects app v1.5.22
Start at app.maritimebids.com
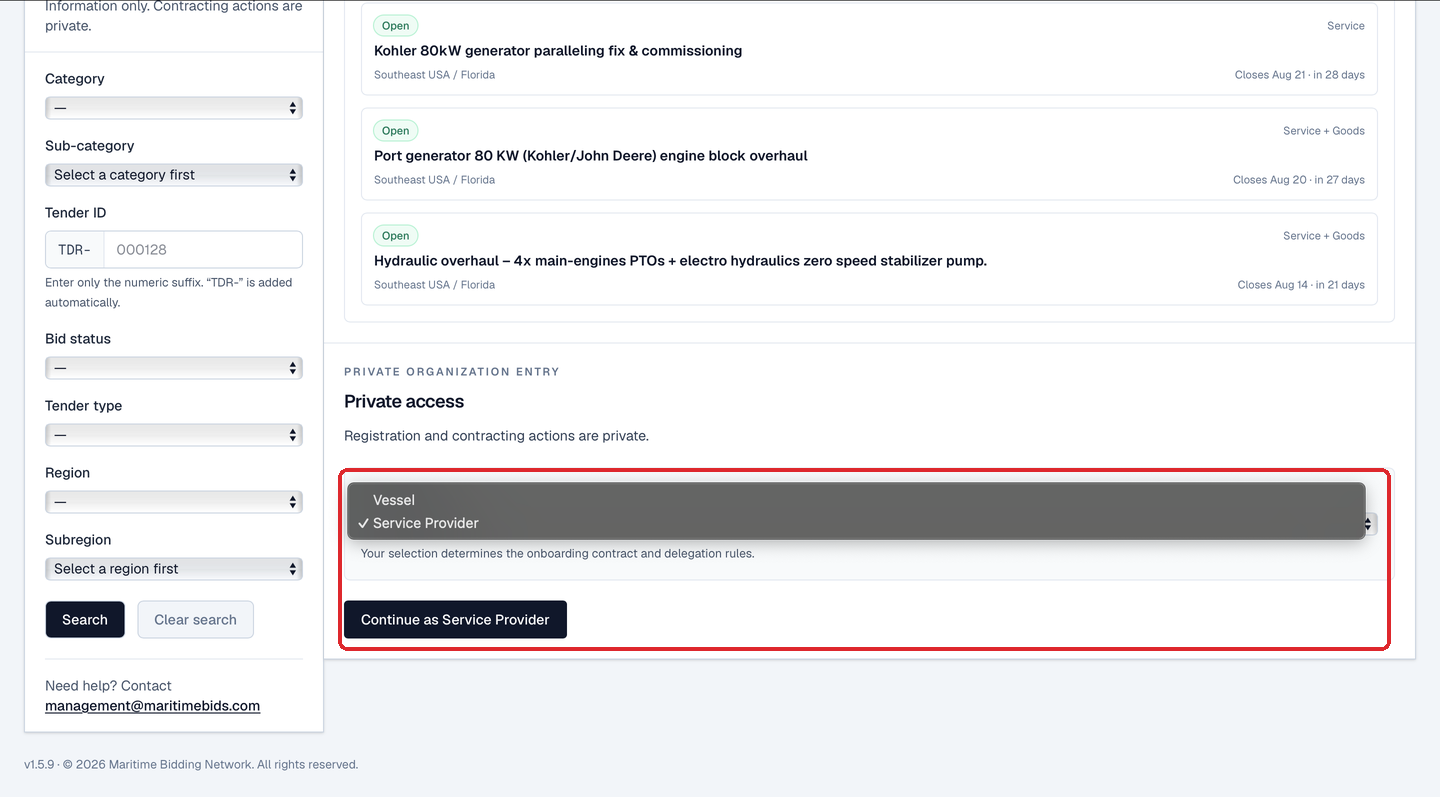
Pick Service Provider, then Continue. You'll sign up at MBN's branded login and verify your email before onboarding opens.
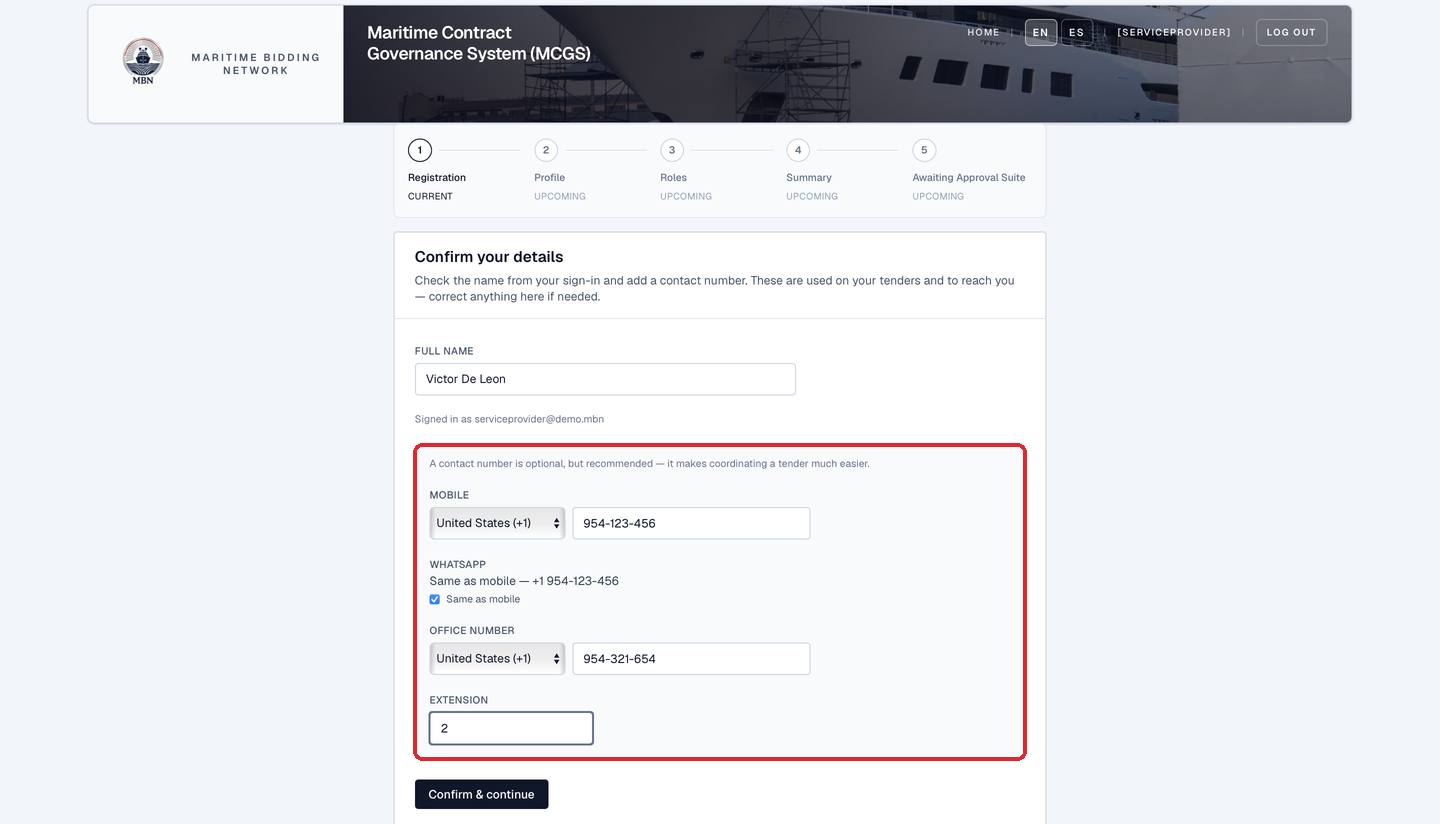
Confirm your details
Check the name that came from your sign-in, it appears on your tenders, and add your contact numbers: a mobile, WhatsApp (same as mobile, or separate), and an office line with extension. Numbers are optional but recommended; they make coordinating a tender much easier.
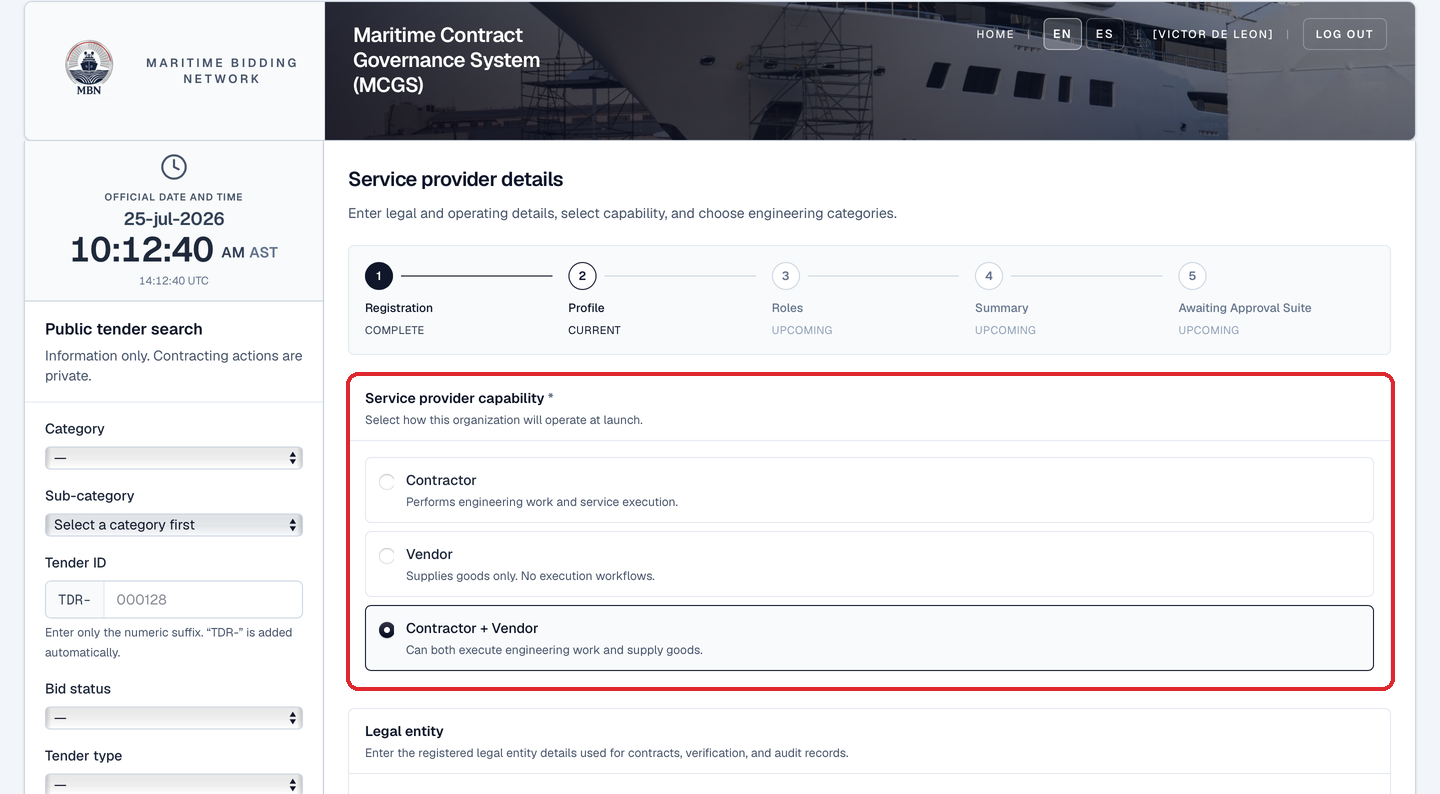
Build your organization profile
Start by declaring your capability, Contractor (performs engineering work and service execution), Vendor (supplies goods only), or both, which sets the roles you'll assign and how tenders route to you. Then your legal entity, legal name, an optional trade name, and a registered address you fill in fast with built-in address autocomplete; your operating profile, now a single operating timezone that's seeded from that address; the regions you serve; and 1–5 engineering categories, expand any category's "What's included" to see the sub-categories it covers, so you pick the right ones (you select at the category level, not individual sub-categories). Your regions and categories are how vessels match tenders to you.
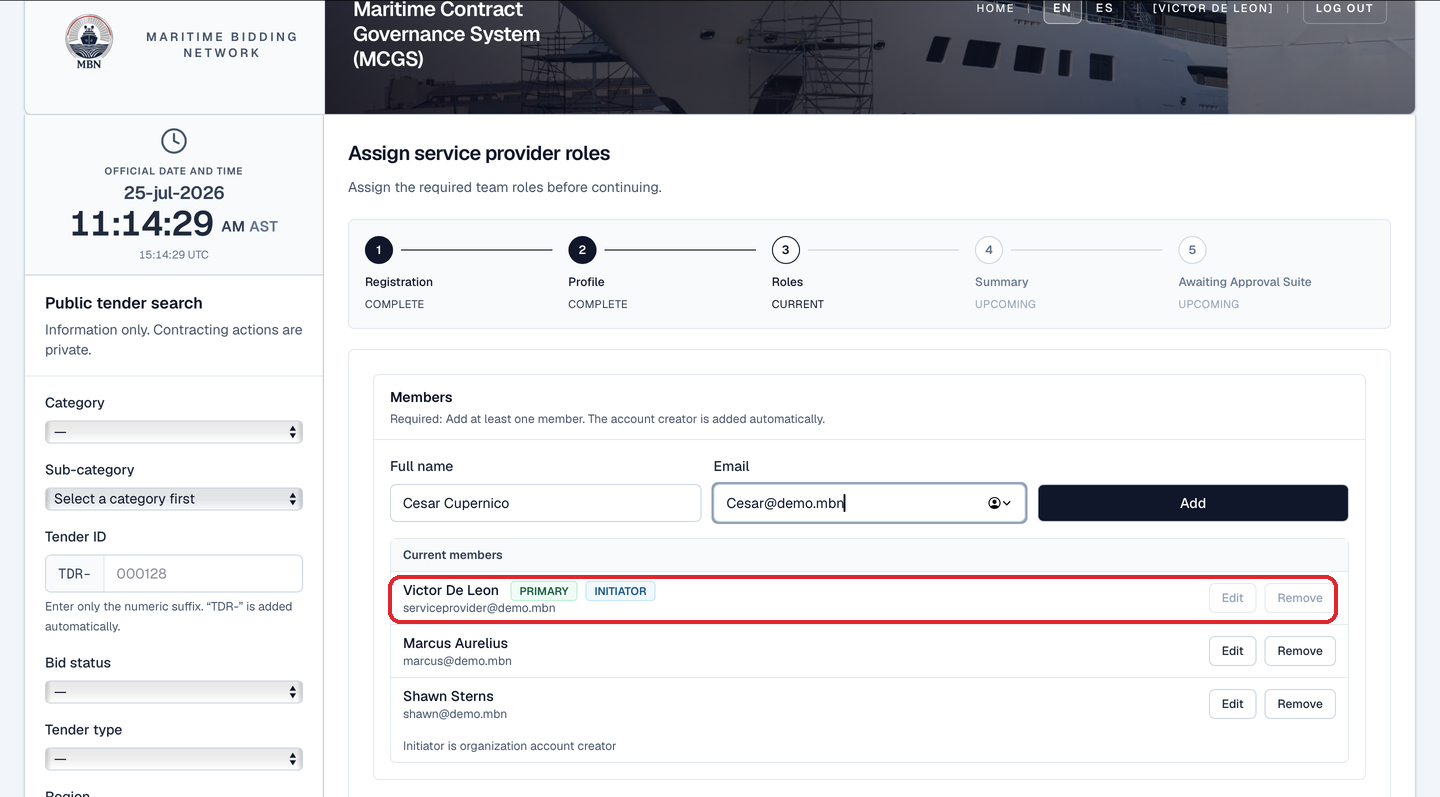
Your team and roles
You're the initiator: the organization's account creator. You're added to the roster automatically and tagged INITIATOR; that row can't be edited or removed. Add teammates by name and email, you can Edit or Remove any teammate you've added right up until you submit. Then, under Role assignments, pick the single Admin from the dropdown: the role that holds authority for the organization, badged PRIMARY on the roster. Required roles follow your capability: a Commercial Manager if you're a Contractor, Sales if you're a Vendor, both if you do both.
You're the Admin: confirm and continue
If you kept Admin on yourself, the Summary ends in a Legal Entity Representation box, you tick the confirmation that the Admin role represents the legal entity registering on MBN and is authorized to act on its behalf, then Confirm & Continue into the Awaiting Approval Suite. You carry the onboarding through yourself.
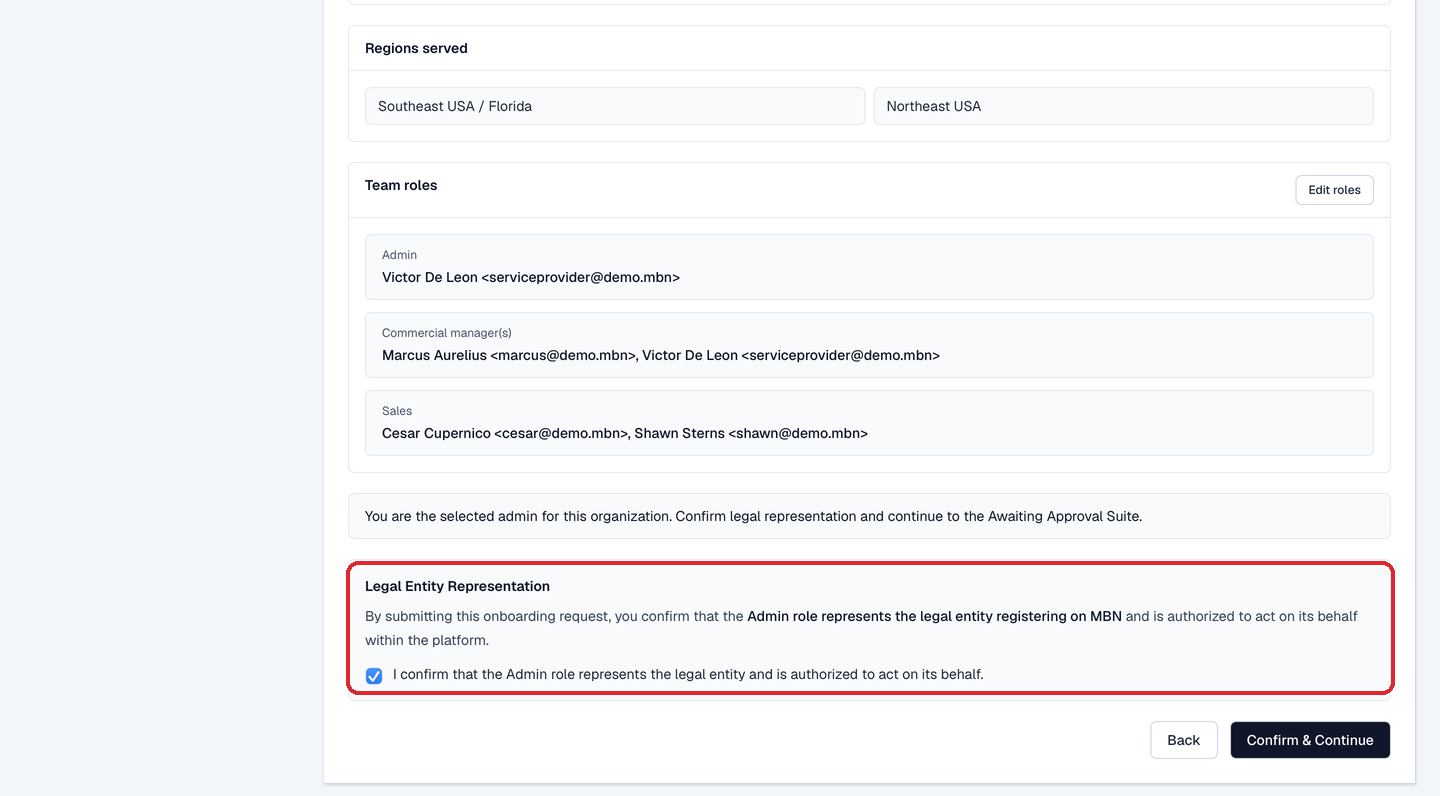
…or hand Admin to someone else
Setting the org up for the owner? Assign Admin to their email back in Roles. Now the Summary ends in an Onboarding Handoff Confirmation box instead, you tick that once you submit, control passes to the designated admin and you can no longer complete the application, then Confirm & Submit to Admin. They receive an email invitation, accept the Admin role, and take over: invitations, legal representation, billing, and submission.
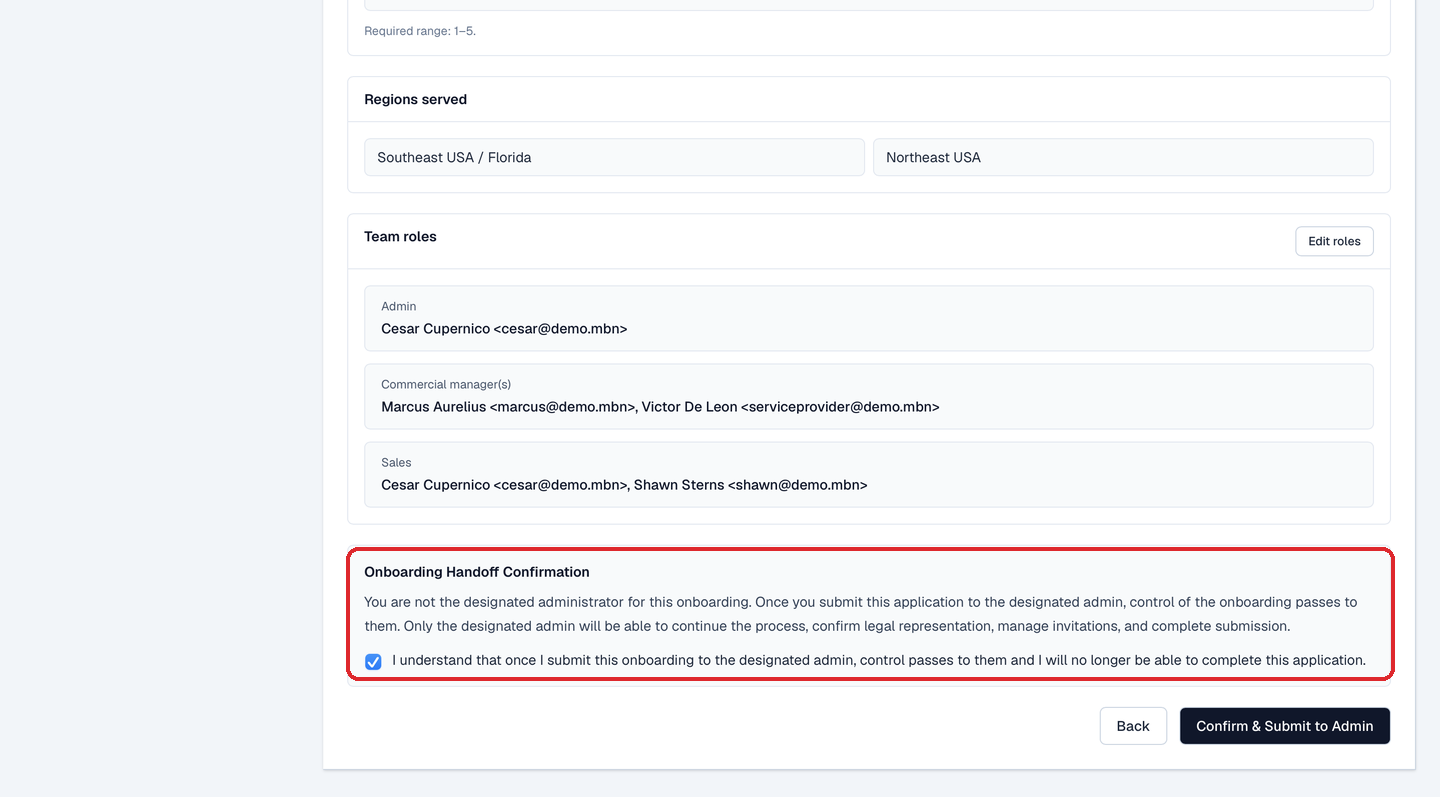
Awaiting Approval Suite: confirm roles, invite your team
You land in the Awaiting Approval Suite: the organization is flagged Pending Legal Entity and the status reads Pending Role Acceptance. Every participant, you included, confirms their assigned role(s); as the initiator you do this to enable your admin panel. From there you send invitations (per person, a selected batch, or all pending at once) and each teammate moves Added → Invited → Accepted. A Submission readiness strip tracks how many required roles are in, "2 of 3 required accepted", and you can still Edit organization info or roles while acceptances are pending.
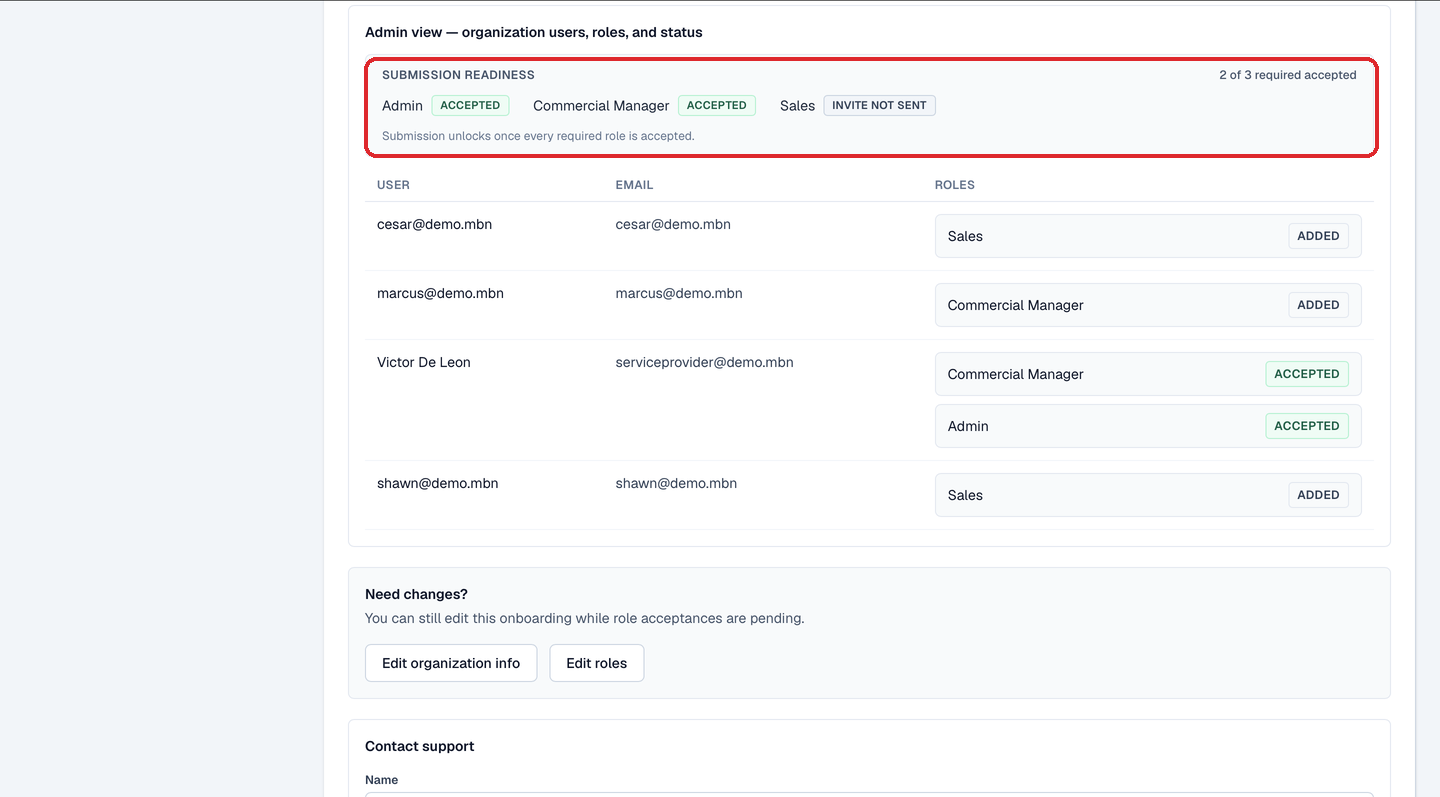
All roles accepted: submit for review
Once every required role is accepted, the strip turns green: Ready to Submit. Billing isn't enabled yet, you can submit your application right now, and a payment method is only requested once billing goes live. Confirm & Submit locks the application: no further changes until an MBN officer reviews it. On approval your organization is created and your dashboard unlocks; if changes are requested or it's rejected, you'll see the reason and can pick up from the same suite.
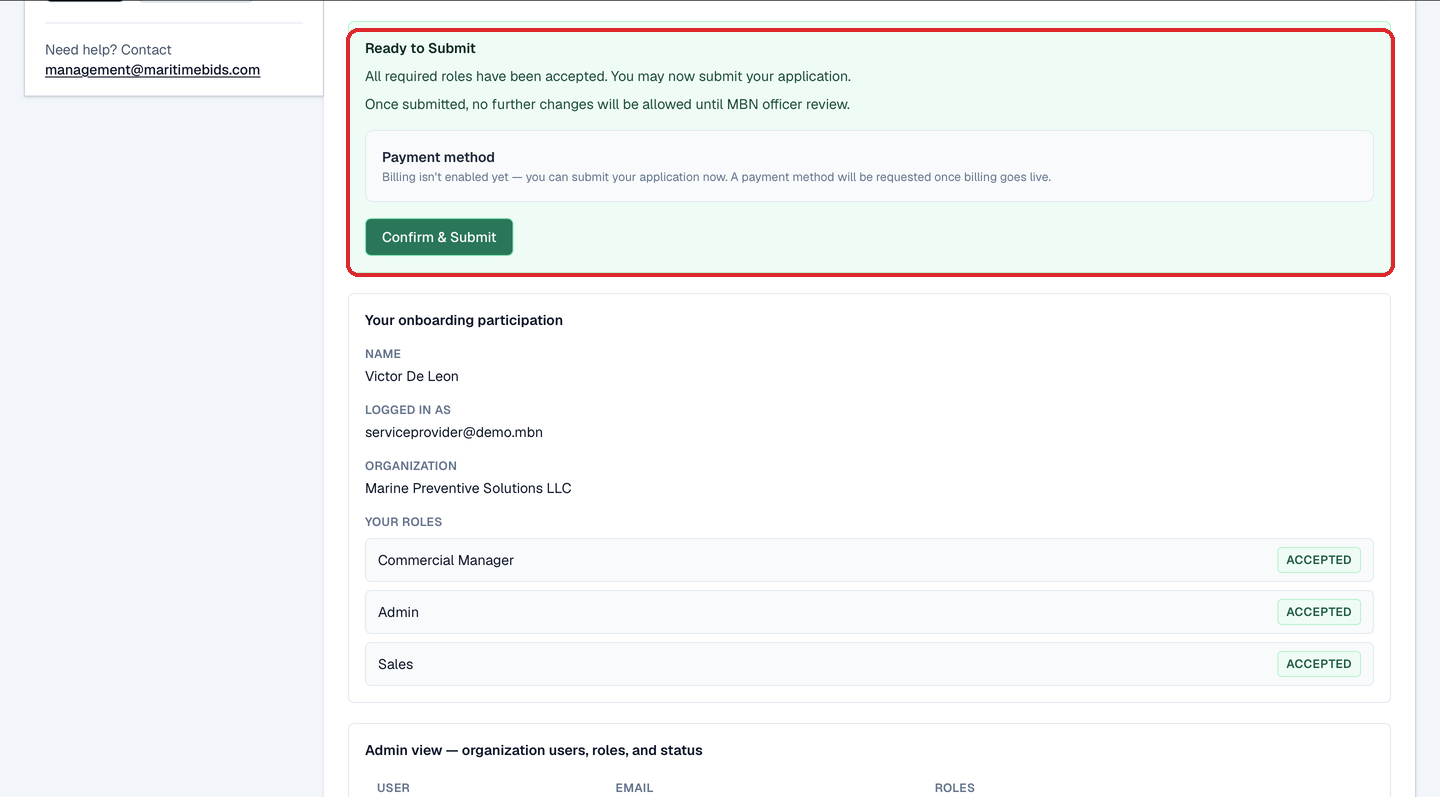
What happens next
Once approved, your categories and regions become your pipeline: the next lesson covers tuning them. Then you're ready to find tenders and quote.
Get on MBN
Request free access to MBN. Once approved, you'll build your profile, declare your capability and categories, and assign roles in about 20 minutes.